How to Create and Edit Items in Product Setup
- This document covers a step-by-step guide to creating and editing items in the Basket point of sale system.
- Using the navigation drop-down menu, on the upper left hand corner of the screen, select Products & Pricing > Products
Upon navigation to the products page, you will be presented with three options:
Create Single Item:
- To create a singular item, click on the “Create Single Item” button. This will bring you to a product creation form, where you are required to input all mandatory fields related to the item you are creating. If any mandatory field is left empty, then you will not be able to save your item.
- If you have configured any product fields in Product Setup page, then you will additionally be able to fill those out here.
- When choosing a department and category, ensure you select the department and categories you wish for your product to be filed under, as this will determine how the product appears when filtering by department and category.
- After all fields are properly filled out, click “Save”. If your item saved successfully, you will be presented with a notice towards the bottom of the screen.
Bulk Create Items:
- To create multiple items at once, you will be required to have a .CSV file to upload. To upload this file, click on the “Bulk Create Items” button. This will bring you to a form upload, where you can manually select the location of your file, or drag and drop the file.

- Upon file upload, you will be presented with rows pertaining to each row of your uploaded .CSV file, and a corresponding header for each cell of that row. If you have included a header row in your .CSV file to organize your data, click the First Row Contains Headers button, so that this row is not included during product creation.
- On the left hand side of the screen, you will be presented with fields that represent your item’s data. Map these fields to the column that represents this field’s data. When hovering over a column option, it’ll highlight that columns data to ensure that is the column you wish to represent that field. Ensure all mandatory fields are represented.
- After each mandatory field has been mapped to a column, click the “Save” button to continue. You will be presented with a view of each item and the columns their data is listed under. Please review that each item’s attributes are displayed properly.
- If everything looks proper, then click “Save Items” to save the items into the Basket point of sale system.
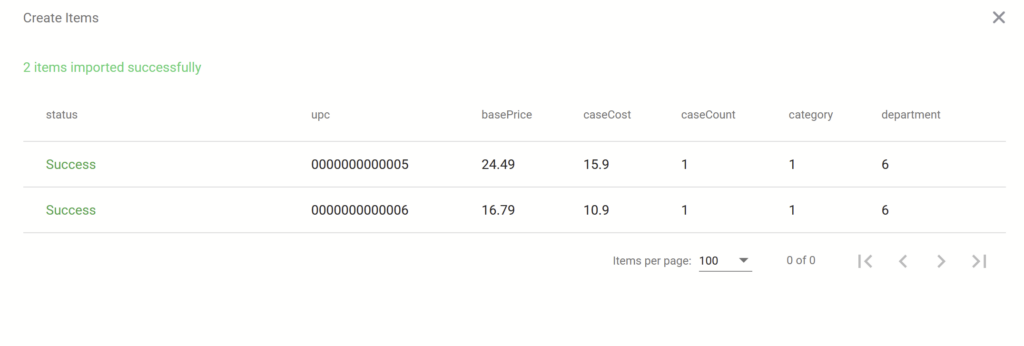
- If your items saved successfully, your item will have a “Success” status displayed next to them. If not, then the reasoning for their failure will be denoted. Please make notice of this status, and review your .CSV file to ensure success.
Bulk Update Items:
- To update multiple items at once, you will be required to have a .CSV file to upload. To upload this file, click on the “Bulk Update Items” button. This will bring you to a form upload, where you can manually select the location of your file, or drag and drop the file.
- Upon file upload, you will be presented with rows pertaining to each row of your uploaded .CSV file, and a corresponding header for each cell of that row. If you have included a header row in your .CSV file to organize your data, click the First Row Contains Headers button, so that this row is not included during product creation.
- On the left hand side of the screen, you will be presented with fields that represent your item’s data. Map these fields to the column that represents this field’s data. When hovering over a column option, it’ll highlight that columns data to ensure that is the column you wish to represent that field.
- With a bulk update, you only need to map the columns you wish to update on the item and their UPC. Every column not mapped will remain the same in the Basket point of sale system.
- After each mandatory field has been mapped to a column, click the “Save” button to continue. You will be presented with a view of each item and the columns their data is listed under. Please review that each item’s attributes are displayed properly.
- If everything looks proper, then click “Save Items” to save the items into the Basket point of sale system.
- If your items saved successfully, your item will have a “Success” status displayed next to them. If not, then the reasoning for their failure will be denoted. Please make notice of this status, and review your .CSV file to ensure success.
Once you have created items in the Basket point of sale system, you will be able to see items organized by their UPC on the left hand side of the screen.
Viewing Items:
- To search for a specific item, please reference the Search Items search-bar on the left hand side of the screen, and input an item’s UPC or description. You will be presented with items similar or exactly matching the information provided.
- To view an item’s fields, click on the item you wish to view from the left hand side. You will be presented with a page denoting all of the item’s fields.
- From this page, you can update an item’s properties individually. Please ensure any updates to mandatory fields are of the correct form, as you will not be able to save these updates otherwise.