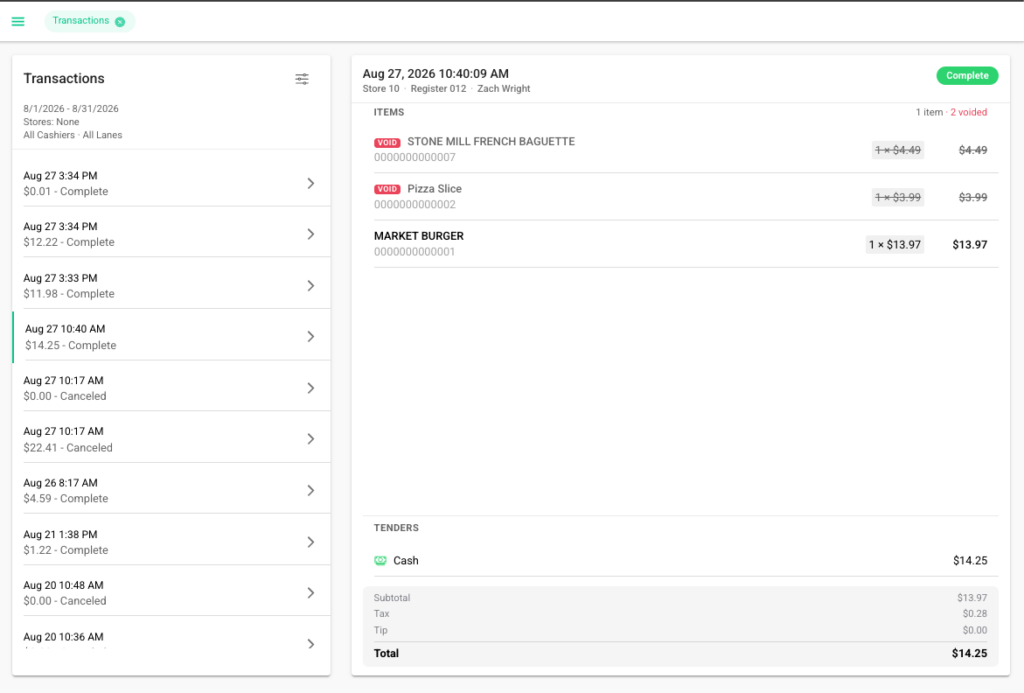
How to View Transaction History
This guide explains how to view and filter Transaction History in the Basket Point of Sale system.
View and Filter Transactions
- From the navigation menu in the upper-left corner of the screen, select Sales > Transactions.
- Once on the Transactions page, select the Filter button located in the upper-right corner of the Transactions panel.
- You can filter the transactions displayed by date, store, cashier, lane, customer, last four digits of a payment card, minimum transaction amount, and maximum transaction amount.
Understanding the Transaction Report
The Transaction Report provides a detailed view of individual transactions based on the filters selected. Transactions are displayed in the panel on the left, showing the date, time, total amount, and transaction status, such as Complete or Canceled. Selecting a transaction displays its full details on the right, including the store, register, cashier, items purchased, voided items, tender type, subtotal, tax, tip, and transaction total. This makes it easy to review individual transactions and quickly identify important details or discrepancies.